Vault on a Pi
My Version of Hashicorp Vault on a Raspberry Pi.
There was a time when many of us techies had Raspberry PIs hanging around not doing much in boxes.
I've got mine monitoring temperatures across the house, doing ad blocking and helping me out doing some docker stuff.
I own a spare Pi 2B which I'd left for dead, but then thought, can I use it for some useful bits of software. I mess about being a cosplay software developer, and managing secrets is definitely a useful thing to do, particularly when you can rotate them and keep them "dynamic".
First our dependencies and what we'll end up installing:
| Software | Version |
|---|---|
| RaspbianOS | 11 (bullseye) |
| Hashicorp Vault | 1.12.2 |
Install Vault as a Service
Download the Open Source Vault binary
1curl https://releases.hashicorp.com/vault/1.12.2/vault_1.12.2_linux_arm.zip -o vault.zip
Unzip and move the Vault binary
1unzip vault.zip
2sudo mv ./vault /usr/bin/vault
Set appropriate capabilities on the vault binary
1sudo setcap cap_ipc_lock=+ep /usr/bin/vault
Create a folder for the vault data
1sudo mkdir -p /opt/hashicorp/vault-data
Add a vault user for the service to run as
1sudo useradd -r -d /opt/hashicorp/vault-data -s /usr/sbin/nologin vault
Set permissions on the vault data directory
1sudo install -o vault -g vault -m 750 -d /opt/hashicorp/vault-data/
Create a Vault configuration
1sudo nano /etc/vault.hcl
Edit the vault.hcl file and put the following contents in:
1ui = true
2storage "file" {
3  path = "/opt/hashicorp/vault-data"
4}
5listener "tcp" {
6 address     = "0.0.0.0:8200"
7 tls_disable = 1
8}
Set permissions on the Vault config file.
1sudo chown vault:vault /etc/vault.hcl
2sudo chmod 640 /etc/vault.hcl
Create systemd service configuration
1sudo nano /etc/systemd/system/vault.service
Contents of the vault.service config file.
 1[Unit]
 2Description=HashiCorp Vault to manage secrets
 3Documentation=https://vaultproject.io/docs/
 4After=network.target
 5ConditionFileNotEmpty=/etc/vault.hcl
 6
 7[Service]
 8User=vault
 9Group=vault
10ExecStart=/usr/bin/vault server -config=/etc/vault.hcl
11ExecReload=/usr/local/bin/kill --signal HUP $MAINPID
12CapabilityBoundingSet=CAP_SYSLOG CAP_IPC_LOCK
13AmbientCapabilities=CAP_IPC_LOCK
14SecureBits=keep-caps
15NoNewPrivileges=yes
16KillSignal=SIGINT
17
18[Install]
19WantedBy=multi-user.target
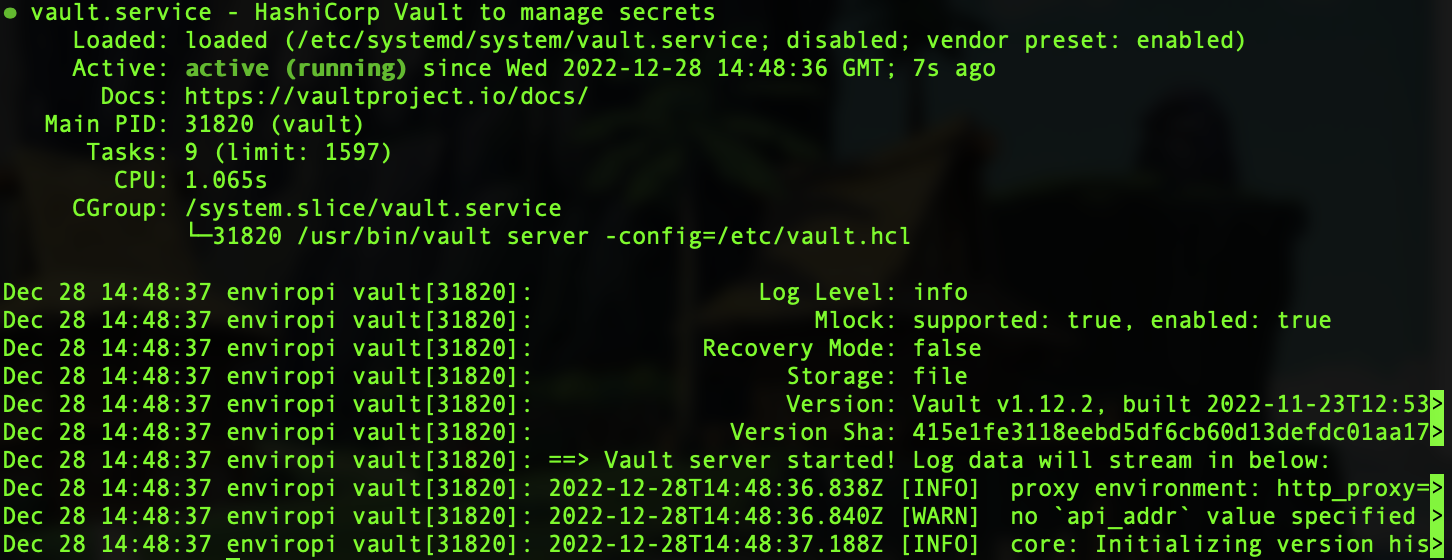
Try and start the service and get its status
1sudo systemctl start vault.service
2sudo systemctl status vault.service
Should see this if successful:
..and if we go to http://host:8200 we should see Vault initial setup
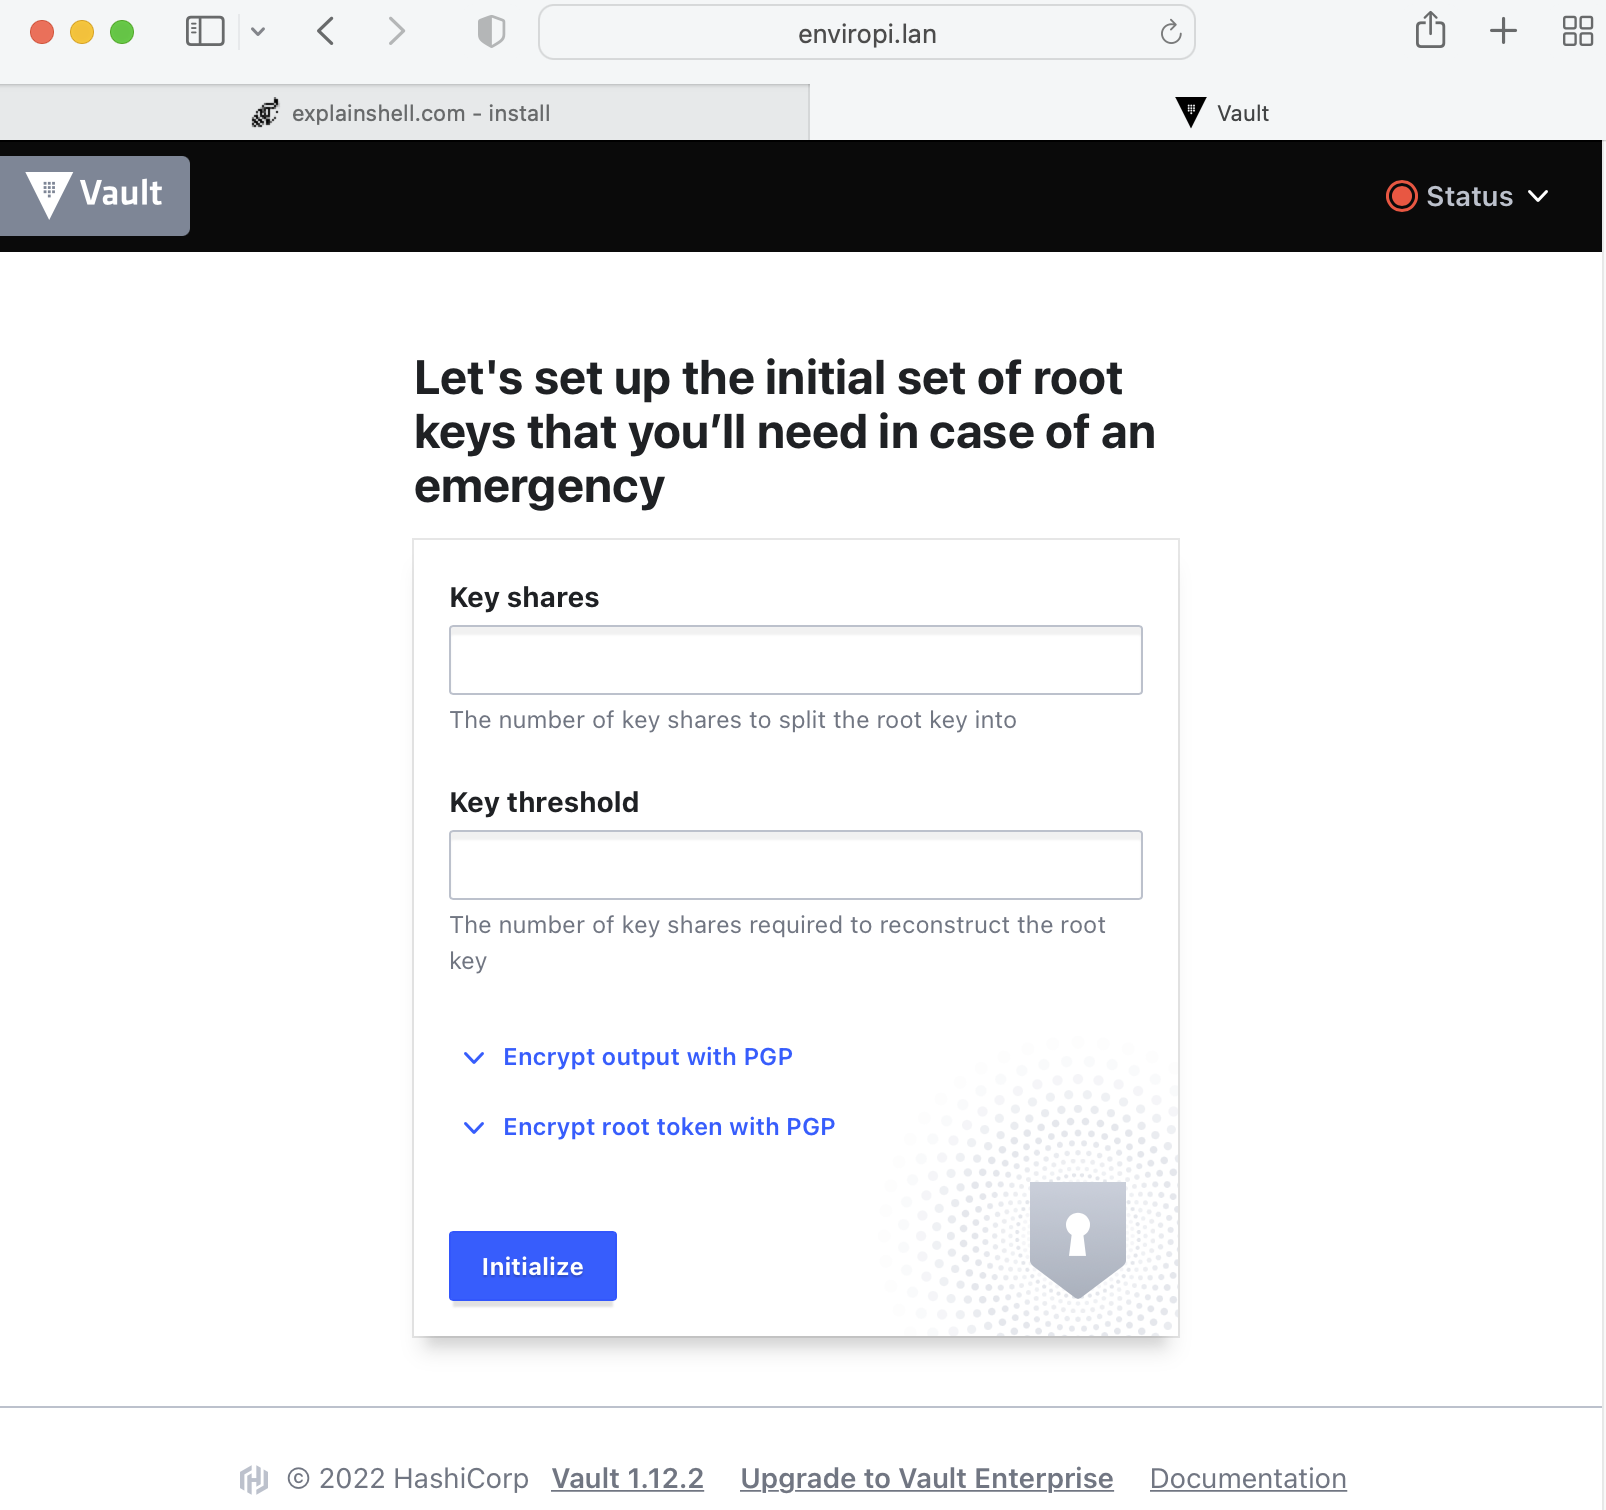
We'll setup some initial configuration just to get Vault going. These are not secure defaults.
Set the key shares and key thresholds to 1 (in secure deployment you would have multiple keys and the threshold defines how many people would need to be input for the secrets database to be unlocked. So say for example key shares = 7, key threshold = 3 would mean you could have seven people that could unlock, but only three need to be present at unlock time).
Click Intialize.
Copy the Initial Root Token and Keys to a safe location, and click Continue to Unseal.
Website asks for Unseal Key Portion, put your key 1 details in that you saved above.
Now you'd set up proper Role based access and other tokens for development.
Don't use this root token in code
Let's create a non-root token.
Let's associate the root pi user with the root vault user, copy the intial root token details in to the VAULT_TOKEN environment variable below. (This is not a secure configuration)
1sudo -s
2echo "export PATH=$PATH:/opt/vault/bin" >> /root/.bashrc
3echo "export VAULT_ADDR=http://127.0.0.1:8200" >> /root/.bashrc
4echo "export VAULT_TOKEN=<myInitialRootToken>" >> /root/.bashrc
5vault token create -policy=default
This will dump out a new token like so:
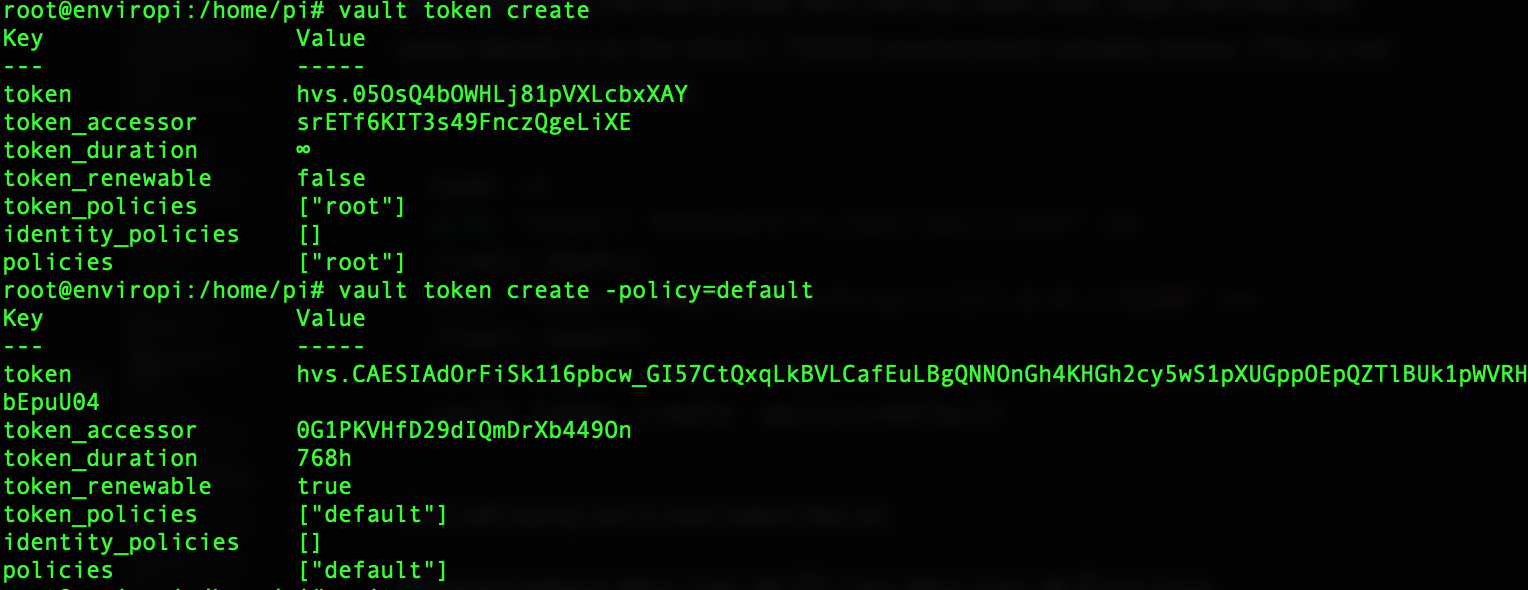
Save these details ready for the next step.
Connecting the Vault CLI to the Vault Service
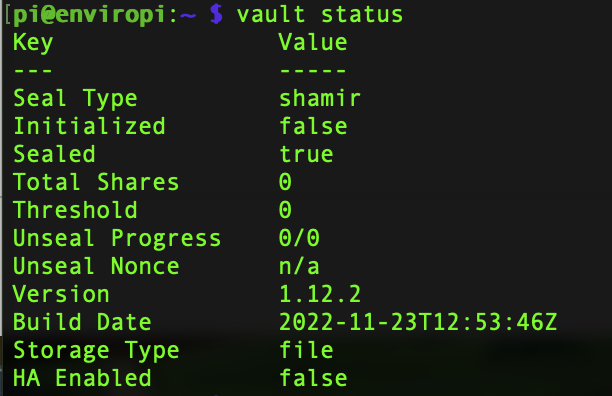
So we've to this point we've downloaded and installed vault on to our Pi. But the Vault Command Line Utility can't talk to it.
1vault status

Make sure vault config file can be read by all users.
1sudo chmod a+r /etc/vault.hcl
Environment variables that enable the Vault CLI to connect to the service. We put them in the bash profile so they load up everytime user logs in.
1echo "export PATH=$PATH:/opt/vault/bin" >> ~/.bashrc
2echo "export VAULT_ADDR=http://127.0.0.1:8200" >> ~/.bashrc
3echo "export VAULT_TOKEN=<myNewToken>" >> ~/.bashrc
Log Out and Log back in again. Run a Vault Status...
1vault status
Let's create a quick secret...
In your "normal" user which we've configured run the following command:
1vault kv put -mount=cubbyhole hello foo=world
You should get a response of:
1Success! Data written to: cubbyhole/hello
...and be able to see it through the Vault Web UI (if you've logged in as the right token)