Finally My Own AWX Server
Finally, My Own AWX Server
I've been wanting my own AWX server for ages
I've messed with a bit of Ansible and found it to be agreeable with some of the previous ways Ive automated code in the past, but I wanted to scale it up (given my infrastucture roots).
I attempted this install two or three times this year across different platforms and install types and had problems sometimes being caused with me experimenting with other technologies at the same time or just out of date documentation.
Below is the instructions for my first working AWX installation.
First our dependencies and what we'll end up installing:
| Software | Version |
|---|---|
| Windows 10 Pro (Host) | 21H2, 19044.2364 |
| VirtualBox | 6.1.32 |
| Ubuntu | 22.04.1 LTS |
| Docker CE | 20.10.22 |
| Minikube | 1.28.0 |
| Kubectl | 1.26.0 |
| Kubernetes | 1.25.3 |
| Kustomize | 4.5.7 |
| AWX | 21.10.2 |
1. Get a Ubuntu VM up and running in VirtualBox.
Fairly simple this instruction, download the latest Ubuntu 22.04 LTS iso and install to a VM in Virtualbox. I gave the VM 8GB RAM, 4 CPUs and 40GB of disk space. I wanted enough room for docker to breathe inside the VM.
I picked Ubuntu as its an easy installation, has a nice GUI to fall back on if need be and well supported by its community.
I also made the network card bridged on to my network direct so my other machines could talk to it if need be.
2. Follow the https://github.com/ansible/awx-operator instructions
In the main, I did follow the instructions that are here but had a couple of stumbling blocks so I thought I'd make it clear here.
2a. Install Docker CE
Refresh the apt caches for most up to date packages and install
1sudo apt update
2sudo apt upgrade
This is for my own personal preference so I can remote in from either my Windows or Mac.
1sudo apt-get install openssh-server
Install dependencies to add docker repositories
1sudo apt install apt-transport-https wget curl gnupg-agent ca-certificates software-properties-common -y
add the GPG keys to allow addition of apt repositories
1curl -fsSL https://download.docker.com/linux/ubuntu/gpg | sudo apt-key add -
add the docker repositories into the apt lists
1sudo add-apt-repository "deb [arch=amd64] https://download.docker.com/linux/ubuntu jammy stable"
docker install...
1sudo apt install docker-ce docker-ce-cli containerd.io -y
make sure docker user group exists
1newgrp docker
add your user to the docker group (allows non-root users to mess with docker)
1sudo usermod -aG docker $USER
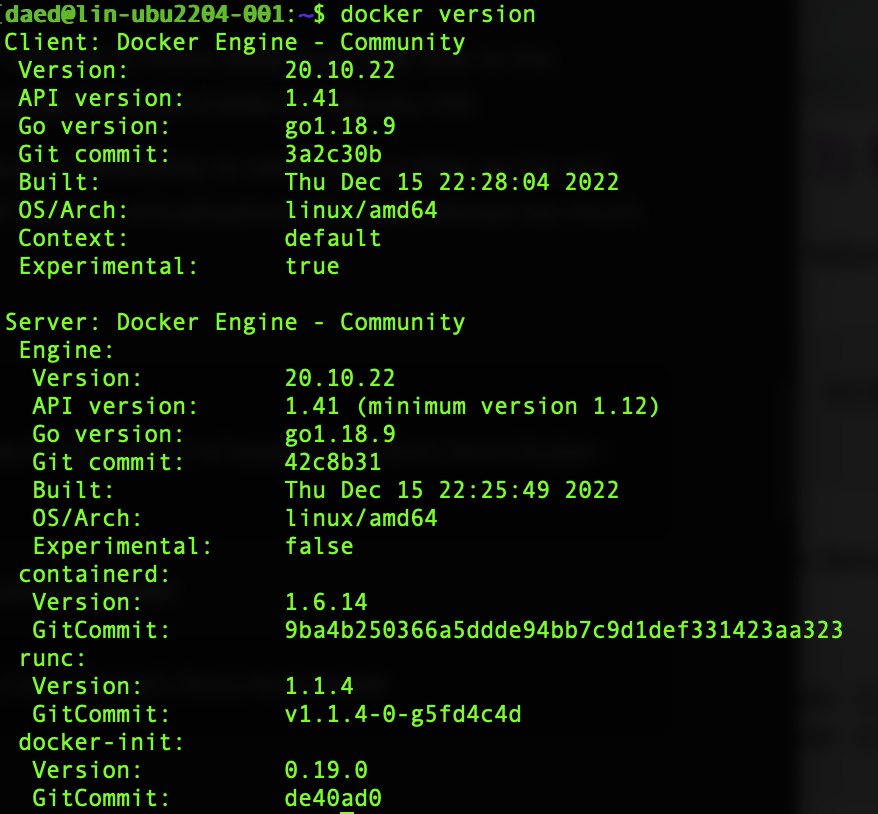
test out the docker install.
1docker version
Should show something like this on success:
2b. Install and setup minikube
Minikube allows a developer to run his own "mini" kubernetes cluster to get to know the software and mess with pods, etc.
You can run it "direct" on Windows, but I wanted to move away from that due to the difficulties I've had in the past, so I'm running minikube inside my Ubuntu VM.
Fortunately docker and minikube on Linux run differently to when run on Mac so I'm not doing full Virtualisation within a Linux VM (nested virtualisation). Not yet noticed too much of a performance penalty for doing this.
Download the minikube binary:
1wget https://storage.googleapis.com/minikube/releases/latest/minikube-linux-amd64
Copy the minikube binary into standard binaries folder
1sudo cp minikube-linux-amd64 /usr/local/bin/minikube
Give it execution permissions
1sudo chmod +x /usr/local/bin/minikube
make it easy to run kubectl commands inside minikube (It is not required for kubectl to be separately installed since it comes already wrapped inside minikube. As demonstrated above, simply prefix minikube kubectl -- before kubectl command, i.e. kubectl get nodes would become minikube kubectl -- get nodes)
1alias kubectl="minikube kubectl --"
...and test.
1minikube version
Should show something like this on success:

Finally lets get the kubernetes cluster up and running (--addons=ingress very important here. This process didn't work without it).
1minikube start --cpus=4 --memory=6g --addons=ingress
Should see something similar to this:
 1$ minikube start --cpus=4 --memory=6g --addons=ingress
 2😄  minikube v1.28.0 on Ubuntu 22.04.1
 3✨  Using the docker driver based on existing profile
 4👍  Starting control plane node minikube in cluster minikube
 5🚜  Pulling base image ...
 6🏃  Updating the running docker "minikube" container ...
 7🐳  Preparing Kubernetes v1.25.3 on Docker 20.10.22 ...
 8🔎  Verifying Kubernetes components...
 9    ▪ Using image gcr.io/k8s-minikube/storage-provisioner:v5
10    ▪ Using image k8s.gcr.io/ingress-nginx/controller:v1.0.0-beta.3
11    ▪ Using image k8s.gcr.io/ingress-nginx/kube-webhook-certgen:v1.0
12    ▪ Using image k8s.gcr.io/ingress-nginx/kube-webhook-certgen:v1.0
13🔎  Verifying ingress addon...
14🌟  Enabled addons: storage-provisioner, default-storageclass, ingress
15🏄  Done! kubectl is now configured to use "minikube" cluster and "default" namespace by default
Checking minikube's status, you should see this:
 1$ minikube kubectl -- get nodes
 2NAME       STATUS   ROLES                  AGE    VERSION
 3minikube   Ready    control-plane,master   113s   v1.28.0
 4
 5$ minikube kubectl -- get pods -A
 6NAMESPACE       NAME                                        READY   STATUS      RESTARTS   AGE
 7ingress-nginx   ingress-nginx-admission-create--1-kk67h     0/1     Completed   0          2m1s
 8ingress-nginx   ingress-nginx-admission-patch--1-7mp2r      0/1     Completed   1          2m1s
 9ingress-nginx   ingress-nginx-controller-69bdbc4d57-bmwg8   1/1     Running     0          2m
10kube-system     coredns-78fcd69978-q7nmx                    1/1     Running     0          2m
11kube-system     etcd-minikube                               1/1     Running     0          2m12s
12kube-system     kube-apiserver-minikube                     1/1     Running     0          2m16s
13kube-system     kube-controller-manager-minikube            1/1     Running     0          2m12s
14kube-system     kube-proxy-5mmnw                            1/1     Running     0          2m1s
15kube-system     kube-scheduler-minikube                     1/1     Running     0          2m15s
16kube-system     storage-provisioner                         1/1     Running     0          2m11s
2c. Install Kustomize
Kustomize is a Kubernetes configuration transformation tool that enables you to customize untemplated YAML files, leaving the original files untouched.
https://kubectl.docs.kubernetes.io/installation/kustomize/binaries/
1curl -s "https://raw.githubusercontent.com/kubernetes-sigs/kustomize/master/hack/install_kustomize.sh"  | bash
2
3sudo mv ./kustomize /usr/local/bin
3. Create a kustomization.yaml file and deploy
Create a folder to put your yaml files
1mkdir awxPlay
2
3cd awxPlay
create kustomization.yaml in the awxPlay folder with the below contents. Replace <tag> with the latest tag on the AWX github site (I put 1.1.3)
 1apiVersion: kustomize.config.k8s.io/v1beta1
 2kind: Kustomization
 3resources:
 4  # Find the latest tag here: https://github.com/ansible/awx-operator/releases
 5  - github.com/ansible/awx-operator/config/default?ref=<tag>
 6
 7# Set the image tags to match the git version from above
 8images:
 9  - name: quay.io/ansible/awx-operator
10    newTag: <tag>
11
12# Specify a custom namespace in which to install AWX
13namespace: awx
Install the manifests by doing:
 1$ kustomize build . | kubectl apply -f -
 2
 3namespace/awx created
 4customresourcedefinition.apiextensions.k8s.io/awxbackups.awx.ansible.com created
 5customresourcedefinition.apiextensions.k8s.io/awxrestores.awx.ansible.com created
 6customresourcedefinition.apiextensions.k8s.io/awxs.awx.ansible.com created
 7serviceaccount/awx-operator-controller-manager created
 8role.rbac.authorization.k8s.io/awx-operator-awx-manager-role created
 9role.rbac.authorization.k8s.io/awx-operator-leader-election-role created
10clusterrole.rbac.authorization.k8s.io/awx-operator-metrics-reader created
11clusterrole.rbac.authorization.k8s.io/awx-operator-proxy-role created
12rolebinding.rbac.authorization.k8s.io/awx-operator-awx-manager-rolebinding created
13rolebinding.rbac.authorization.k8s.io/awx-operator-leader-election-rolebinding created
14clusterrolebinding.rbac.authorization.k8s.io/awx-operator-proxy-rolebinding created
15configmap/awx-operator-awx-manager-config created
16service/awx-operator-controller-manager-metrics-service created
17deployment.apps/awx-operator-controller-manager created
After some time, we should be able to check it with:
1$ kubectl get pods -n awx
2
3NAME                                               READY   STATUS    RESTARTS   AGE
4awx-operator-controller-manager-66ccd8f997-rhd4z   2/2     Running   0          11s
4. Create an AWX deployment file and add to kustomization.yaml
In your awxPlay folder, create a file called awx-demo.yaml with the following contents, I changed <nodeport_port> to 30080:
1---
2apiVersion: awx.ansible.com/v1beta1
3kind: AWX
4metadata:
5  name: awx-demo
6spec:
7  service_type: nodeport
8  # default nodeport_port is 30080
9  nodeport_port: <nodeport_port>
and reference that file in the kustomization.yaml like this:
1...
2resources:
3  - github.com/ansible/awx-operator/config/default?ref=<tag>
4  # Add this extra line:
5  - awx-demo.yaml
6...
...and finally run kustomize again:
1kustomize build . | kubectl apply -f -
If everything works, you should get a running AWX instance. It'd look like this:

5. Login and see it....
This command shows you the URL with which to access AWX instance.
1$ minikube service -n awx awx-demo-service --url
User is admin, password is magically revealed when you run the below.
1$ kubectl get secret awx-demo-admin-password -o jsonpath="{.data.password}" -n awx | base64 --decode ; echo
Appendix: Some of the Errors I saw along the way....
So below we see where I was getting issues with Pods starting.
Error(s):
 1$ kubectl get pods -A
 2
 3  NAMESPACE       NAME                                               READY   STATUS                  RESTARTS         AGE
 4  awx             awx-demo-589886bb5-r6njx                           0/4     Init:ImagePullBackOff   0                69m
 5  awx             awx-demo-postgres-13-0                             1/1     Running                 0                70m
 6  awx             awx-operator-controller-manager-577f6968b5-qx9xl   1/2     CrashLoopBackOff        12 (2m27s ago)   71m
 7  ingress-nginx   ingress-nginx-admission-create-64tgt               0/1     Completed               0                160m
 8  ingress-nginx   ingress-nginx-admission-patch-4cz6h                0/1     Completed               0                160m
 9  ingress-nginx   ingress-nginx-controller-5959f988fd-99vdd          1/1     Running                 0                160m
10  kube-system     coredns-565d847f94-7cj6m                           1/1     Running                 0                160m
11  kube-system     etcd-minikube                                      1/1     Running                 0                160m
12  kube-system     kube-apiserver-minikube                            1/1     Running                 0                160m
13  kube-system     kube-controller-manager-minikube                   1/1     Running                 0                160m
14  kube-system     kube-proxy-79rqj                                   1/1     Running                 0                160m
15  kube-system     kube-scheduler-minikube                            1/1     Running                 0                160m
16  kube-system     storage-provisioner                                1/1     Running                 12 (2m26s ago)   160m
After much tracking back through logs and kubectl describes I got to the below workarounds
Error:
1  Type     Reason   Age                    From     Message
2  ----     ------   ----                   ----     -------
3  Warning  Failed   15m (x15 over 94m)     kubelet  Failed to pull image "quay.io/ansible/awx-ee:latest": rpc error: code = Unknown desc = context deadline exceeded
4  Normal   BackOff  6m18s (x254 over 94m)  kubelet  Back-off pulling image "quay.io/ansible/awx-ee:latest"
5  Warning  Failed   35s                    kubelet  Failed to pull image "quay.io/ansible/awx:21.10.2": rpc error: code = Unknown desc = context deadline exceeded
This looks to relate image "quay.io/ansible/awx:21.10.2" being large and not pulling quick enough, so we manually intervene and get it into our docker library by hand.
Workaround:
1$ minikube ssh docker pull quay.io/ansible/awx:21.10.2
Error:
1  Type     Reason   Age                   From     Message
2  ----     ------   ----                  ----     -------
3  Warning  Failed   6m15s (x13 over 71m)  kubelet  Failed to pull image "quay.io/ansible/awx-ee:latest": rpc error: code = Unknown desc = context deadline exceeded
4  Normal   BackOff  3m7s (x192 over 71m)  kubelet  Back-off pulling image "quay.io/ansible/awx-ee:latest"
Same again, different image. This looks to relate image "quay.io/ansible/awx-ee:latest" being large and not pulling quick enough, so we manually intervene and get it into our docker library by hand.
workaround:
1$ minikube ssh docker pull quay.io/ansible/awx-ee:latest
links that helped
https://cloudcone.com/docs/article/how-to-install-docker-on-ubuntu-22-04-20-04/
https://www.linuxtechi.com/how-to-install-minikube-on-ubuntu/
https://kubectl.docs.kubernetes.io/installation/kustomize/binaries/
https://github.com/ansible/awx-operator#creating-a-minikube-cluster-for-testing